
20 Pumpkin Nails 2026 for Chic Fall & Halloween Manicures
20 Pumpkin Nails 2026 for Chic Fall & Halloween Manicures
Pumpkin nails have moved past the cartoon jack-o'-lantern era, and honestly, it is about time. This year's best pumpkin nail designs borrow from runway beauty instead: burnt orange tones, copper shimmer, gold foil, velvet textures and negative space that make pumpkin season look genuinely chic. Whether you want full Halloween drama or just a fall nail idea with a seasonal whisper, these 20 designs cover every mood and skill level.
Browse the full set below, screenshot your favorites, and take them straight to your nail tech (or your own desk if you DIY). Each design includes the colors, shapes, techniques and honest wear-time notes you need to actually recreate it.
1. Burnt Orange Micro French Pumpkin Tips
Pumpkin French tips are the quiet luxury move of the season. Instead of a thick orange smile line, this design uses an ultra-thin burnt orange band painted along the very edge of the nail, like a French manicure that went apple picking. The base stays a sheer milky nude or pale peach, which keeps the whole look soft and grown up.
This works on every shape, but almond and squoval nails show the thin line off best. Short nails suit it beautifully since the thin tip does not eat up nail length. Ask your tech for a micro French in a burnt orange gel (think copper-rust, not bright Halloween orange) over a sheer nude base. A striping brush or fine liner does the cleanest work, and DIYers can manage with nail vinyl guides and two steady coats.
Wear time runs the standard two to three weeks for gel, and tip wear is minimal because the line sits right at the free edge. Maintenance is easy: a fresh top coat at day ten revives the shine. Pair it with gold rings and it reads elegant, not costumey. If you want it moodier, swap the nude base for a translucent smoky taupe and keep the same burnt orange line.

2. Copper Cat-Eye Pumpkin Glow
Cat-eye polish in copper is one of those combinations that feels made for October. The magnetic particles shift from deep bronze to glowing amber as the nail tilts, and on a pumpkin-colored base it creates the illusion of a pumpkin glowing from within. The effect is magnetic, pun intended, without a single painted pumpkin in sight.
Medium to long nails, especially almond and coffin, give the cat-eye wave room to travel. The technique needs a copper or burnt-orange magnetic gel and a strong magnet held close at an angle while the polish is wet; your tech will flash-cure each nail individually so the pattern sets. This is a salon-friendly design that is hard to mess up, since the magnet does the artistry.
Expect two to three weeks of wear with gel. Cat-eye is very forgiving of regrowth because the shifting finish disguises the grow-out line. DIY is possible with magnetic polish kits, though salon magnets produce a sharper beam. For extra depth, layer the cat-eye over a dark espresso base so the copper looks lit like a lantern. This is the design for anyone who wants pumpkin season energy with zero literal imagery.

3. Gold Foil Pumpkin Accents
Gold foil pumpkins are the jewelry of this list. The concept: a deep burnt-orange or terracotta base on most nails, with one or two accent nails carrying hand-stamped or hand-painted pumpkin silhouettes in real gold foil flakes. The foil catches light like jewelry, which is why these read festive and fancy at once.
Almond and oval shapes flatter the rounded pumpkin forms best. Your tech applies foil flakes with foil gel or a sticky layer, presses them on, then seals with two top coats (foil edges lift if under-sealed). The pumpkins themselves can be simple curved shapes in foil, or orange pumpkins outlined in foil over a nude accent nail. Both look expensive.
Wear time is a standard two to three weeks, but foil accents chip faster if you are rough with your hands, so gloves for chores pay off. DIY difficulty is medium: gold foil kits are cheap and forgiving, and imperfect placement still looks artful. This is a great salon request phrase: "burnt orange set with gold foil pumpkin accents on the ring fingers." It photographs beautifully for Pinterest, too.

4. Pumpkin Spice Velvet Nails
Velvet nails bring a soft-focus, plush texture that suits pumpkin spice season perfectly. A magnetic velvet gel in a warm pumpkin spice shade (cinnamon, nutmeg, ginger tones) creates a fuzzy light effect that looks like the surface of a ripe gourd in golden light. The whole nail glows softly instead of shining hard.
This design flatters shorter nails especially well, because the velvet texture adds visual richness without needing length. Round and squoval shapes are ideal. The application mirrors cat-eye: magnetic polish, then a magnet waved slowly across the wet nail creates the velvet grain instead of a sharp beam. Gel or magnetic regular polish both work.
Wear runs two to three weeks for gel. Velvet finishes hide minor imperfections and scratches better than glossy chrome, so they age gracefully. It is one of the easier magnetic effects for DIY, since a soft grain is more forgiving than a precise line. Ask your tech for "velvet effect in pumpkin spice" and show a shade reference. A matte top coat deepens the plush look; glossy top coat makes it glow. Both are gorgeous.
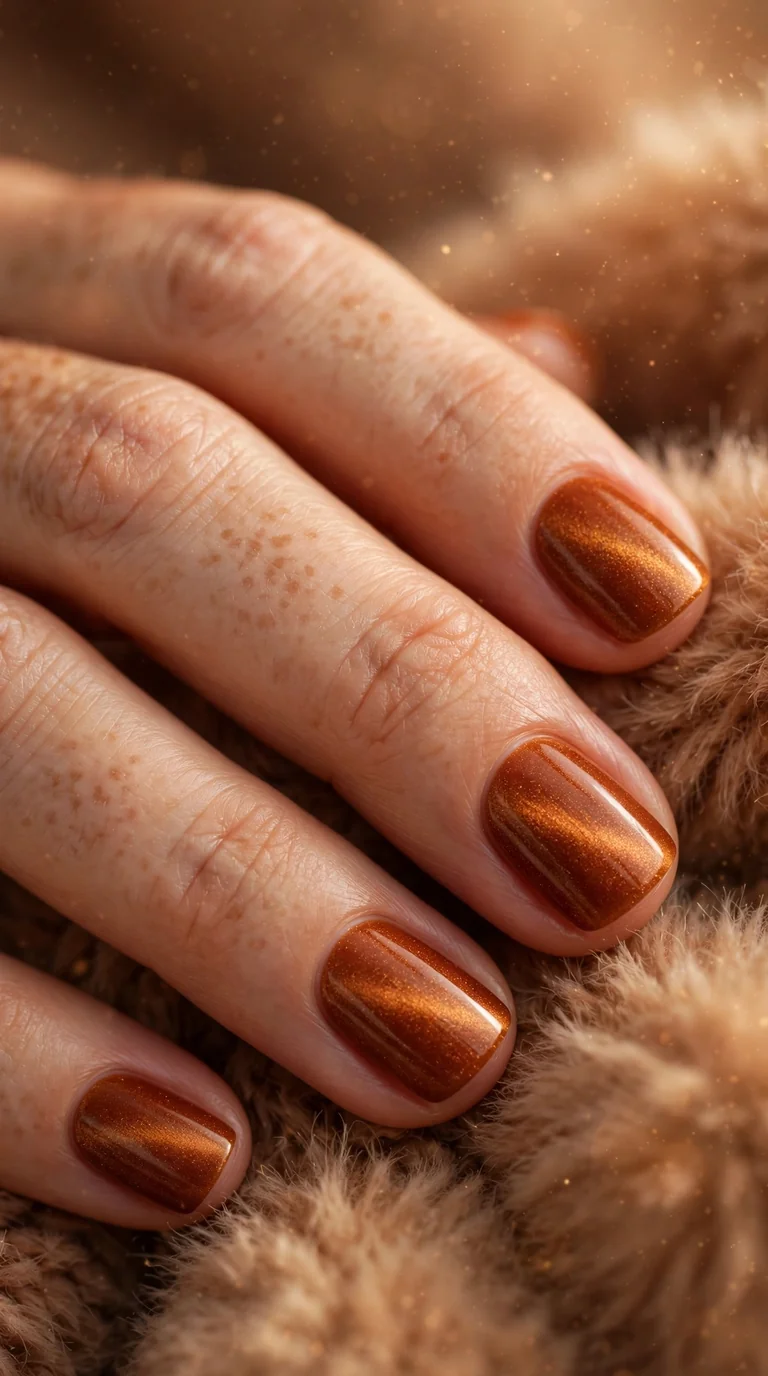
5. Harvest Marble Pumpkin Swirls
Marble nails in harvest tones look like polished stone pulled from an autumn quarry. Swirls of rust, burnt orange, cream and a whisper of sage move across a nude base, with the occasional thin gold vein for luxury. It is abstract, so it never screams Halloween, but the palette keeps it firmly in pumpkin season.
Longer nails (medium almond or coffin) give the marble room to flow. The classic technique is blooming gel: colors dropped into a wet clear layer and allowed to spread on their own, then a fine brush drags veins through. Water-marbling works in regular polish but blooming gel is far more reliable. Each nail comes out unique, which is part of the charm.
Expect two to three weeks of wear. Because the design is busy, regrowth and small chips are nearly invisible, making this a low-maintenance pick. DIY is genuinely doable with blooming gel and a dotting tool; the gel does most of the work for you. Tell your salon: "harvest marble in rust, cream and gold over a nude base." Seal with a glossy top coat to make the veins look wet and dimensional.

6. Negative Space Mini Pumpkins
Negative space designs are the minimalist answer to Halloween pumpkin nails. Tiny hand-painted pumpkin outlines, just the curved ribs of the gourd, sit on bare or sheer-nude nails with plenty of empty space around them. It is subtle from a distance and delightful up close, like a secret seasonal detail.
This is a short-nail hero. The design needs very little real estate, so even bitten-to-the-quick nails can carry it. Round and short squoval shapes work best. Technique is simple: a thin liner brush paints the pumpkin curves in burnt orange or copper over a sheer base, with a tiny green stem. A dotting tool can build the pumpkin from dots if freehand curves intimidate you.
Gel wear runs two to three weeks, and the sparse design means chips are barely noticeable. This is one of the most DIY-friendly designs on the list; the pumpkins are forgiving shapes and asymmetry looks intentional. Ask your tech for "minimal negative space pumpkins, fine line work." It pairs beautifully with everything in a fall wardrobe because the nude base goes with all of it.

7. Matte Burnt Orange With Glossy Tips
Texture contrast is doing all the work here. The full nail wears a matte burnt orange, and just the tip gets a glossy finish in the same shade, creating a French-tip effect made purely of light reflection. It is sophisticated, modern, and quietly seasonal without any art at all.
Any shape and length works, though almond and coffin show the tip contrast most clearly. The technique is straightforward: two coats of burnt orange gel, matte top coat over the whole nail, then a glossy top coat painted only across the tip. Precision matters at the smile line, so striping tape or a steady hand helps.
Wear time is two to three weeks. Matte surfaces show oils and scratches sooner than glossy ones, so wipe nails with alcohol occasionally and reapply matte top coat if they start looking shiny at the edges. DIY difficulty is low to medium; the design is all about clean lines, not art skills. Salon wording: "matte burnt orange with a glossy French tip in the same color." It is office-appropriate Halloween energy.

8. Pumpkin Patch Landscape Nails
For the maximalists, a hand-painted pumpkin patch scene turns nails into tiny autumn paintings. Think a dusky gradient sky (deep plum fading to amber), a dark ground line, and small round pumpkins with curly vines and leaves scattered across two or three accent nails, with the remaining nails in a coordinating solid.
This needs length: medium to long almond or coffin nails are the canvas. This is firmly salon territory unless you paint miniatures for fun; a skilled nail artist builds the scene with gel paints and a detail brush, layering background, pumpkins, then tiny highlights. Expect to pay for art time, and book a longer appointment.
Wear runs two to three weeks with gel, and the art is sealed under top coat so it lasts as long as the base. Because only a few nails carry the scene, damage risk is spread out. This is the statement design of the set: perfect for Halloween week itself, and it gets compliments from strangers. Ask to see your artist's landscape portfolio first; this design lives or dies on brush control.

9. Champagne Chrome Pumpkin Accents
Champagne chrome gives pumpkin season a red-carpet finish. Nails wear a warm champagne or pale copper chrome over the whole set, with pumpkin motifs (tiny pumpkins, vines, or a single bold pumpkin) painted or stamped in a deeper burnt orange on one or two accents. The mirror shine keeps it glamorous rather than folksy.
Medium lengths in almond, oval or coffin suit chrome best; very short nails can look stubby under mirror finishes. Chrome powder is buffed over a no-wipe gel top coat, then sealed; the pumpkin art goes on after sealing or before the final top coat depending on your tech's method. Chrome application is quick for a pro but tricky at home (powder gets everywhere and the base must be perfectly smooth).
Wear is two to three weeks, though chrome can show tip wear sooner than creme finishes. It is best as a salon service; DIY chrome kits exist but results vary wildly. These orange nail ideas lean dressy, ideal for fall weddings or Halloween parties where you still want polish. Wording: "champagne chrome full set with burnt orange pumpkin art on the ring fingers."
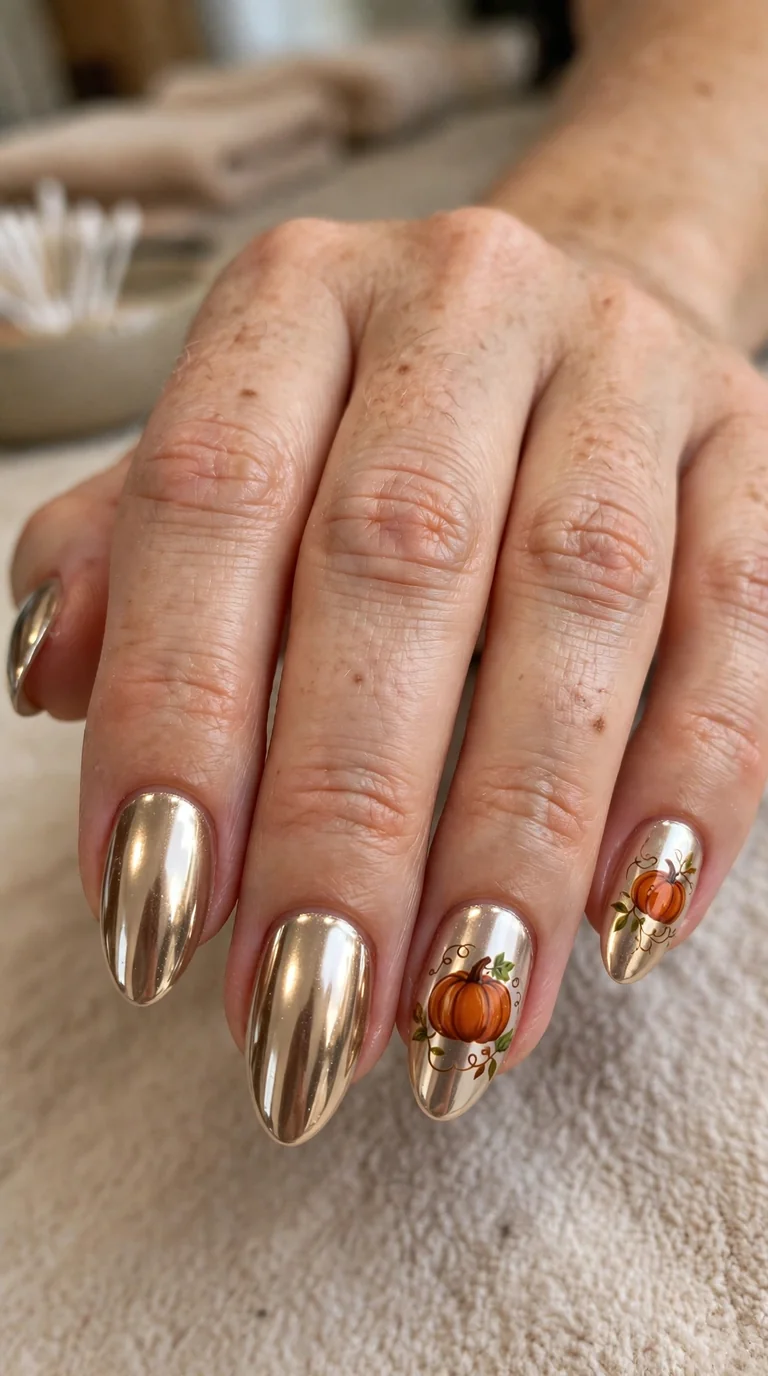
10. Rust Ombré With Black Pumpkin Silhouettes
Ombré in rust tones fading from deep espresso at the cuticle to bright pumpkin at the tip, with stark black pumpkin silhouettes stamped or painted over it, gives serious Halloween drama without looking cheap. The gradient does the pretty work; the black pumpkins do the spooky work. Together they balance perfectly.
Medium to long nails show the gradient best; coffin and almond are natural picks. The ombré is sponged or airbrushed with gel, then pumpkin silhouettes are stamped with black stamping polish (stamping makes this very achievable) or hand-painted. The contrast is high, so clean edges matter: liquid latex around the cuticles saves cleanup time.
Expect two to three weeks of wear. Dark gradients hide regrowth well. DIY is medium difficulty: sponging ombré is learnable, and stamping plates with pumpkin designs are inexpensive and reliable. These are unapologetic halloween pumpkin nails, best worn the two weeks around October 31. Salon request: "rust ombré with black pumpkin silhouette stamping." Add a glossy top coat to make the gradient glow.

11. Pumpkin Plaid Flannel Nails
Plaid brings cozy flannel-shirt energy to your fingertips. Thin intersecting lines in burnt orange, cream, rust and deep brown cross over a warm nude or soft pumpkin base, mimicking classic fall flannel. It is preppy, warm, and unmistakably autumn without a single pumpkin shape.
Short to medium nails in squoval or almond wear plaid best; the pattern needs some width to read clearly. Striping brushes and striping tape create the cleanest lines; many techs paint the base, then drag thin lines vertically and horizontally with a liner brush. Gel is ideal because mistakes wipe off before curing.
Wear runs two to three weeks. Busy patterns camouflage chips and regrowth, so this is a practical long-wear choice. DIY is medium: patience matters more than talent, and tape keeps lines straight. These fall nail ideas pair with literally everything in an October wardrobe. Ask for "fall plaid in burnt orange, cream and brown." Vary the line thickness slightly for a handwoven, authentic flannel feel.

12. Sage and Pumpkin Duo
Sage green is pumpkin's most sophisticated partner. This design alternates muted sage nails with burnt orange pumpkin nails, sometimes adding a single sage nail with a tiny hand-painted pumpkin in cream. The contrast is fresh and modern, pulling pumpkin season away from the expected orange-black pairing entirely.
Any shape and length works; this is one of the most versatile designs on the list. The application is simple color blocking, which makes it fast in the salon and very DIY friendly. Use creme finishes for a clean look, or make the pumpkin nails glossy and the sage nails matte for subtle texture play.
Two to three weeks of gel wear, minimal maintenance. Solid colors show chips more than patterns, so keep a matching polish for touch-ups if you DIY in regular polish. This is the design for anyone who finds traditional Halloween colors too loud. Salon wording is simple: "alternating sage and burnt orange, one pumpkin accent." It also transitions beautifully into November, since nothing about it screams costume.
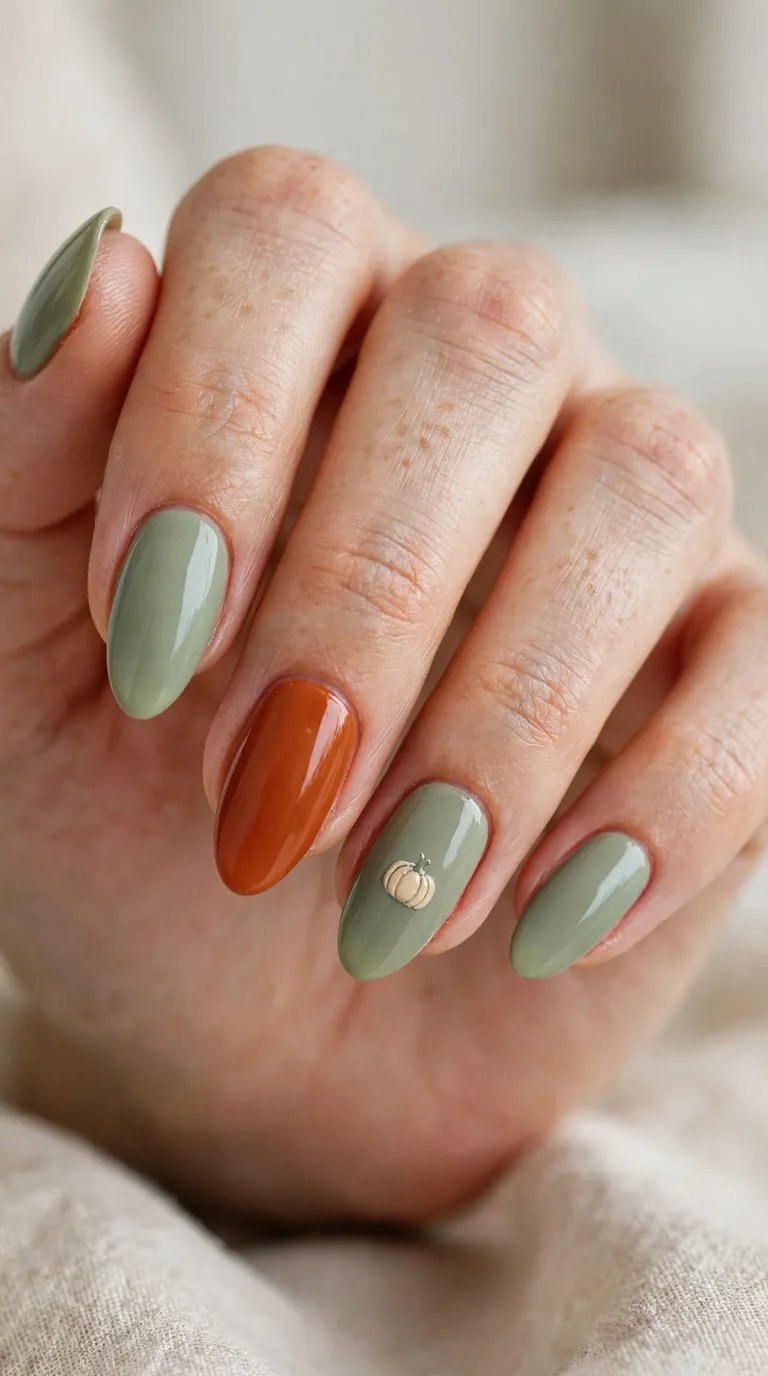
13. Harvest Moon Glitter Ombré
A glitter ombré that moves from deep aubergine or espresso at the cuticle to glowing copper-gold glitter at the tip reads like a harvest moon rising. It is the glamorous cousin of the rust ombré: all shimmer, no silhouettes, pure autumn light on the nail.
Medium to long nails, especially almond and stiletto, carry glitter gradients beautifully. The technique layers fine copper and gold glitter densely at the tip and fades it toward the cuticle, either sponged or brushed. Gel glitter is easiest; loose glitter over a sticky layer works in regular polish. Two top coats are non-negotiable for a smooth finish.
Wear is two to three weeks, and glitter is famously chip-resistant since the texture hides everything. Removal takes longer (soak thoroughly, never peel), which is the main downside. DIY friendly: glitter gradients are among the most forgiving nail art techniques. These autumn nail art looks suit evening events and Halloween parties alike. Ask for "copper glitter ombré, dense at the tips." It catches candlelight like nothing else.

14. Tortoiseshell Pumpkin Nails
Tortoiseshell pattern in amber, caramel and deep brown translucent layers looks like sunlight through honey, and it sits perfectly in the pumpkin palette. The classic tortie technique uses jelly polishes layered in irregular patches over a sheer amber base, creating depth that looks almost three-dimensional.
Medium lengths in almond or oval show the layered depth best. The technique: sheer amber base, then irregular blobs of translucent brown and caramel jelly polish, slightly overlapping, sealed glossy. It is an art of controlled randomness, which makes it relaxing to do and different on every nail. BIAB or gel works; regular jelly polishes work too.
Two to three weeks of wear for gel. The busy translucent pattern hides regrowth and minor chips exceptionally well. DIY difficulty is low to medium; there is no wrong way to place the blobs. These chic halloween nails lean fashion-forward rather than festive, which makes them wearable all season. Salon request: "tortoiseshell in amber and caramel jelly." A glossy top coat is essential; matte kills the depth.
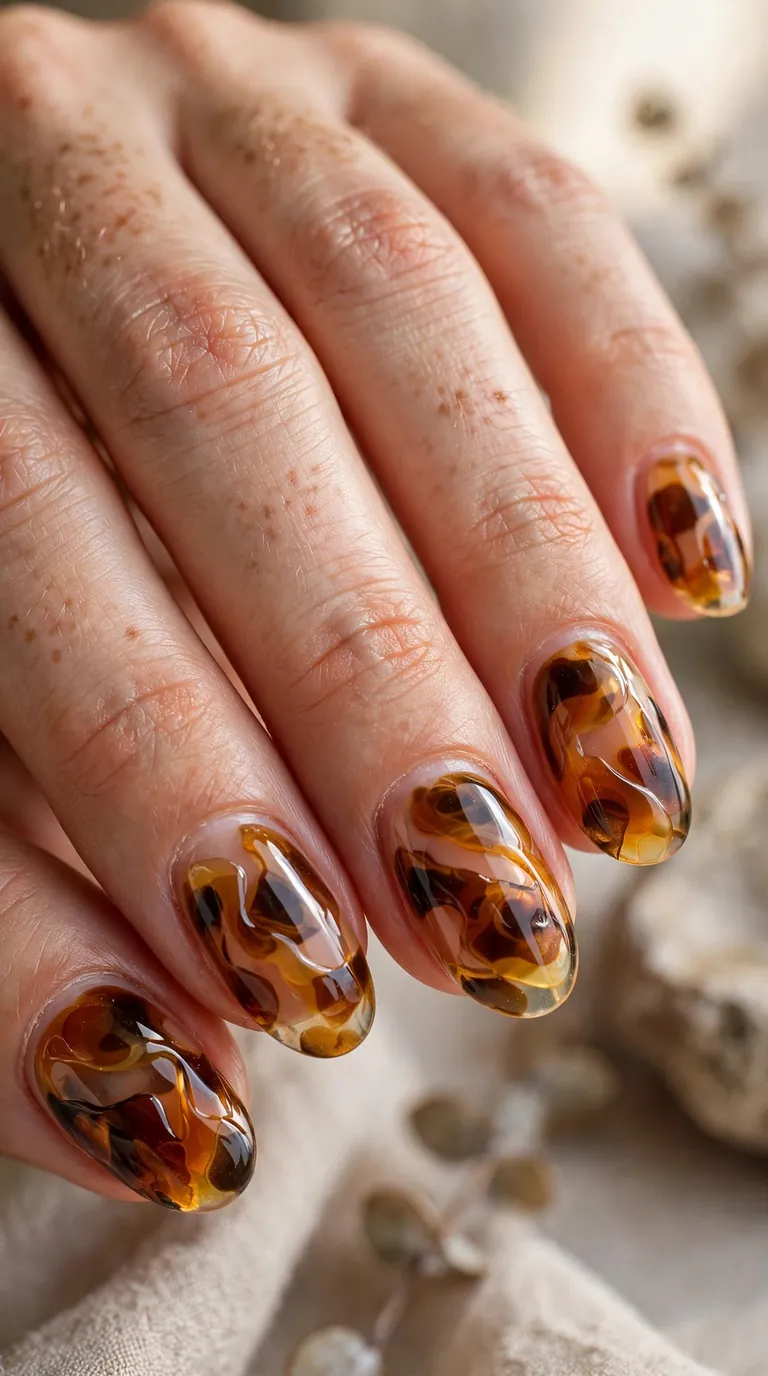
15. Pumpkin Blossom Floral Nails
Delicate florals on a pumpkin base prove that autumn nail art can be soft. Small cream and rust blossoms with sage leaves are hand-painted over a sheer pumpkin or warm nude base, like a botanical print in fall colors. It is romantic, detailed, and completely different from every bold design on this list.
Medium to long nails give the florals space; almond and oval are ideal. This is hand-painted art with a detail brush and dotting tools: five-petal flowers built from dots, tiny leaf strokes, fine stems. It takes a steady hand and real time, so book accordingly and expect art pricing. Stamping plates with floral designs offer a shortcut that still looks lovely.
Wear runs two to three weeks sealed under gel top coat. Fine art can show wear at the free edge first, so slightly rounded shapes protect it. DIY is hard unless you already paint florals; this one is worth the salon visit. It is also the most wedding-friendly pumpkin design here. Wording: "sheer pumpkin base with hand-painted cream and rust florals." Timeless, feminine, and endlessly complimented.

16. Cream and Pumpkin Color Block
Bold color blocking in cream and pumpkin is graphic, modern, and surprisingly chic. Each nail is split diagonally or vertically into clean sections of warm cream and rich pumpkin, sometimes with a thin gold line dividing the two. It is architectural rather than decorative, and it photographs strikingly.
Short to medium nails in squoval or almond carry geometric designs crisply. Striping tape or nail vinyls create the sharp divisions; freehand rarely looks clean enough for this style. Alternate which side gets the pumpkin across nails for rhythm, or keep it consistent for a bolder statement.
Two to three weeks of gel wear. Sharp lines show chips at the color boundary, so cap the free edge carefully with top coat. DIY is medium: the design is simple shapes, but tape placement takes patience. These orange nail ideas suit minimalists who still want seasonal color. Salon request: "diagonal color block, cream and pumpkin with a gold dividing line." It is also easy to adapt: swap cream for sage or pumpkin for rust and it becomes a new design.

17. Textured 3D Pumpkin Nails
Three-dimensional texture takes pumpkin nails into sculpture territory. Raised pumpkin ribs built with builder gel or 3D gel sit on a glossy pumpkin base, sometimes with a tiny sculpted stem; the light catches each ridge like a real gourd. It is tactile, dimensional, and impossible to ignore.
Medium to long nails are needed for the sculptural elements; short nails cannot hold the dimension comfortably. This is advanced salon work: builder gel is shaped into ribs and cured, then color is applied over or the 3D elements are built in colored gel. Expect the longest appointment and highest art pricing on this list.
Wear is two to three weeks, but 3D elements can catch on things, so this is not a design for hands-on work weeks. It is a special-occasion set: Halloween parties, photoshoots, content creation. DIY is not realistic for beginners; even experienced DIYers find 3D gel tricky. These pumpkin nail designs are pure statement. Salon wording: "3D sculpted pumpkin texture in burnt orange builder gel." Handle with a little care and they last beautifully.

18. Burgundy and Pumpkin With Gold Lines
Deep burgundy paired with pumpkin is fall's most luxurious color combination. Alternate rich burgundy nails with burnt orange pumpkin nails, then add hairline gold striping: a single vertical line, a thin frame near the cuticle, or delicate gold arcs. The gold detailing is what lifts it from simple to stunning.
Any shape and length works beautifully. The application is straightforward color blocking plus striping-tape or freehand gold lines with metallic gel paint. Chrome gold powder over the lines gives the brightest metallic finish. This is a fast salon set with high visual payoff, which makes it great value.
Two to three weeks of wear. Dark colors show regrowth, so this suits people who maintain a strict fill schedule. DIY is low to medium: solid colors plus tape-straight lines are very achievable. These gold foil pumpkin nails adjacent designs feel expensive without foil's fussiness. Salon request: "alternating burgundy and pumpkin with fine gold striping." It works for Thanksgiving too, extending the wear season.

19. Smoky Pumpkin Mist Nails
Smoky, diffused color in pumpkin tones looks like autumn fog over a harvest field. Sheer layers of burnt orange, rust and smoky gray melt into each other with soft, blurred edges, usually over a milky base. There are no hard lines anywhere; the whole nail is atmosphere.
Medium lengths in almond or oval suit the dreamy effect. The technique uses blooming gel or sheer jelly layers diffused with a brush, sometimes with a makeup sponge for the softest blend. It is similar to aura nails but moodier and more seasonal. Multiple thin layers build the depth; rushing creates muddiness, so patience matters.
Wear runs two to three weeks. The diffused design hides regrowth beautifully since there are no lines to betray it. DIY is medium: the technique is forgiving because softness is the goal, but color control takes practice. These are the most understated pumpkin nails here, ideal for anyone who wants the palette without the theme. Salon wording: "smoky diffused pumpkin tones, soft blended finish." A glossy top coat keeps the mist luminous.

20. Espresso and Caramel Pumpkin French
A reverse-seasonal French: deep espresso tips over a warm caramel-pumpkin base, or a classic French where the tip is espresso and a thin caramel line traces beneath it. The dark-to-warm contrast is rich and cozy, like the design equivalent of a pumpkin spice latte in a ceramic mug.
Almond, oval and squoval shapes all suit French variations. The technique is a standard French application with the colors swapped to fall tones; a cleanup brush perfects the smile line. Adding the thin caramel underline (a "double French") is the detail that makes it 2026 rather than 2016.
Two to three weeks of gel wear. French designs show tip wear first, so cap the free edge well and avoid using nails as tools. DIY is medium; French guides make it accessible. These pumpkin french tips in espresso are the most wearable design for conservative workplaces that still allow polish. Salon request: "espresso French tips over a caramel base, with a thin caramel underline." Elegant, seasonal, and endlessly repeatable.

Pro Tips for Pumpkin Nails That Last
Burnt orange and rust pigments can stain the natural nail, so never skip a proper base coat, even under gel; a ridge-filling base adds extra protection for porous nails. If you DIY in regular polish, apply thin coats and let each layer dry fully, because thick orange polish bubbles and dents easily. For hand-painted pumpkin art, keep a small cleanup brush dipped in acetone nearby; crisp edges around the cuticle are what separate salon-looking from homemade. And when the season ends, soak gel off properly instead of peeling: pumpkin shades are unforgiving, and peeling takes layers of your natural nail with the color.
For more seasonal inspiration in the same family, these cute halloween nail ideas lean playful while this set stays chic, and the fall nails brown and gold palette pairs beautifully with several designs above if you want to mix sets across hands or weeks.
Frequently Asked Questions
How long do pumpkin nail designs usually last?
In gel, most of these designs last two to three weeks with proper application and capping of the free edge. Regular polish versions last five to seven days, with glitter and busy patterns holding up best. Hand-painted art and foil accents may show wear slightly sooner at the tips, so be gentle with them during the first 48 hours while everything fully hardens.
Can I do pumpkin nails on short nails?
Absolutely. Designs like the micro French tips, negative space mini pumpkins, velvet finish and sage-and-pumpkin duo were made for short nails. Avoid the sculptural 3D designs and full landscape scenes, which need length for the art to read clearly. Short almond or squoval shapes carry fall colors beautifully.
What colors go best with pumpkin orange nails?
Burnt orange pairs beautifully with sage green, cream, espresso, burgundy, gold and copper. For Halloween specifically, black creates drama; for everyday chic, stick with neutrals like cream, taupe and soft brown. Metallics (gold foil, champagne chrome, copper cat-eye) elevate pumpkin shades from casual to elegant instantly.
Are pumpkin nails only for Halloween?
Not at all. While bold designs like black silhouettes and patch scenes peak around October 31, most of these ideas (tortoiseshell, velvet, marble, French variations) work from late September through Thanksgiving. The chic 2026 direction is seasonal rather than costumey, so the subtler designs transition easily into November.
How much do pumpkin nail designs cost at a salon?
A solid-color gel set with a seasonal shade typically runs at standard manicure pricing. Hand-painted art, 3D sculpting, chrome and detailed scenes add art fees per nail or per set, so intricate designs can cost significantly more. Simple upgrades like a micro French, velvet effect or cat-eye finish usually add only a small upcharge and deliver big visual impact.
Conclusion
The best pumpkin nails of 2026 are not costumes for your fingertips; they are fall color done with intention. Pick one design that matches your length, your lifestyle and how much maintenance you honestly want, then wear it with confidence. Whether you go quiet with micro French tips or bold with a hand-painted patch scene, there is a pumpkin design here with your name on it.



3 Comments